Making a voting plan for 2020


Holding up my mail in ballot and wearing an "I voted today" sticker.

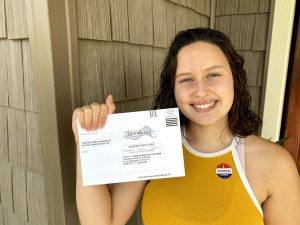
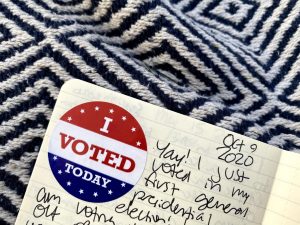
I recently sent in my ballot, casting my vote in a general presidential election for the first time ever. The pandemic has complicated the voting process, but nevertheless I was excited to participate in the process. I chose to vote by mail because I got a request form in the mail and it seemed like an easy way to get my vote in ahead of the election, while potentially avoiding lines at a physical polling place.

If you are eligible to vote this election and have not figured out how you are going to do that yet, make a voting plan! That starts with registering to vote. If you want to vote at an Iowa address, you can do that on this website.  If you aren’t sure about your registration address or status, you can check that on the Hawk the Vote website.

Next, you should figure out how you want to vote. You can vote by mail, vote early at in-person satellite locations, or vote on election day, November 3. It is key to plan ahead if you don’t want to vote on election day. For mail voters, ballot requests (note: not the actual ballots) need to be received by Iowa county auditors by October 24. The actual ballots need to be sent back by November 2. You can track your absentee ballot on this webpage.

Picture of a notebook with an "I voted today" sticker inside.
I keep a notebook where I track the elections I voted in.

For more details on how to register to vote and the different voting format, here are some helpful links:

If you haven’t already, please take the time to check out these resources and figure out how you will be casting your ballot this election.

Masks: necessary and fun

When my high school classes went online and I started hanging out with my friends outside and six feet apart, rather than in each others’ homes on the same couch, I was still adjusting to the reality of the pandemic. One aspect that I hadn’t really accepted yet was that masks were the new normal and we might be wearing them for months. I was never against masks, I just hadn’t been in public at all since the spread in the US started, so I wasn’t used to wearing them. The idea of wearing a mask whenever I left the house for an unknown amount of time bummed me out.

Since classes started at the University of Iowa, I’ve been around others, and thus wearing masks, more than ever. I always understood the need for masks to keep people safe from COVID-19, but recently I’ve started having a lot of fun wearing them. I stocked up on reusable masks from Target and Old Navy with simple patterns and colors on them so I have plenty of options and can even match them with my clothes that day. I also bought a few from Raygun with sayings on them, like, “read the room.” Masks have become another accessory to consider when I’m getting ready, and I feel confident wearing one knowing I’m protecting others and tying my outfit together.

Saving lives should be enough of a reason to do something as simple as covering your mouth and nose, but by having fun with your masks you can make the most out of depressing circumstances.

I recently embroidered the simple cloth mask the University of Iowa provided. I always want to yell at people I see not wearing their mask properly, so I decided to let my mask do that for me by stitching, “cover your nose” into the fabric. If anyone is looking for an easy craft or a way to have more fun with PPE, here is how I did it.

I am by no means an expert at embroidering, this is only the fourth item I’ve embroidered. This is a simple project for any skill level, I think it would be an easy first project for someone trying to embroider.

Supplies

  • cloth mask
  • embroidery thread
  • needle
  • pencil
  • scissors
  • iron or hair straightener

I thought I would use an embroidery hoop as well, but after trying it out I realized it would be easier to just hold the mask in my hand.

Directions

  1. Use the pencil to plan where you are going to embroider. I only embroidered on the top fold of my mask because that doesn’t cover my nose or mouth directly. I don’t think embroidering the mask is very risky because the holes you create are very small and are filled with the thread, but just in case the holes are big enough to let something out, the top fold it isn’t the crucial part covering your mouth and nose. For extra precaution you can attach an extra piece of cloth to the inside of your mask to make sure nothing is getting out. I also wouldn’t recommend embroidering in multiple folds of the mask because it could affect the way it stretches across your face.
  2. Stitch your design. Do whatever is appropriate for your skill level. I am very new to embroidery, so I did simple capital letters. If you look on TikTok or Pinterest you can find beginners stitches.
  3. Wash and dry your mask. I could still see my pencil marks after I embroidered my mask and washing it got rid of that. You should also wash any masks that weren’t packaged when you bought them before wearing them.
  4. Iron. Use an iron so the embroidery sits flat on the mask. If you don’t have an iron you can use a hair straighter.
  5. Wear it! Keep others safe and adhere to this step every day.